Photography, CGI, Motion, and Post-Production align and intertwine at Duggal Studios, where the artistry of a boutique studio meets the impact of a global powerhouse.
Located in a beautifully renovated space on Duggal Visual Solutions’ Brooklyn Navy Yard campus, our full-service post house goes beyond retouching to deliver images with impact. One of our fastest-growing service lines is computer-generated imagery, or CGI. This digital art form has dramatically altered the post-production landscape, demanding more skill, detail and service from a post house than ever before.
CGI Post House: How It Works
Using CG rendering techniques, we create photorealistic 3D imagery that can be viewed from any perspective in any environment. 3D imaging yields enormous flexibility in print, animation and many other applications while paving a linear path from concept to completion.
When you designate an image for CGI, there are several steps in the process before your vision is transformed into 3D. All of these are completed in-house by the team at Duggal Studios:
1. Assessment of Supplied References
These references are sometimes as detailed as Technical Drawings from a product manufacturer or as simple as reference photography pulled from the internet. Each reference acts as a roadmap or North Star for the artist throughout their process.
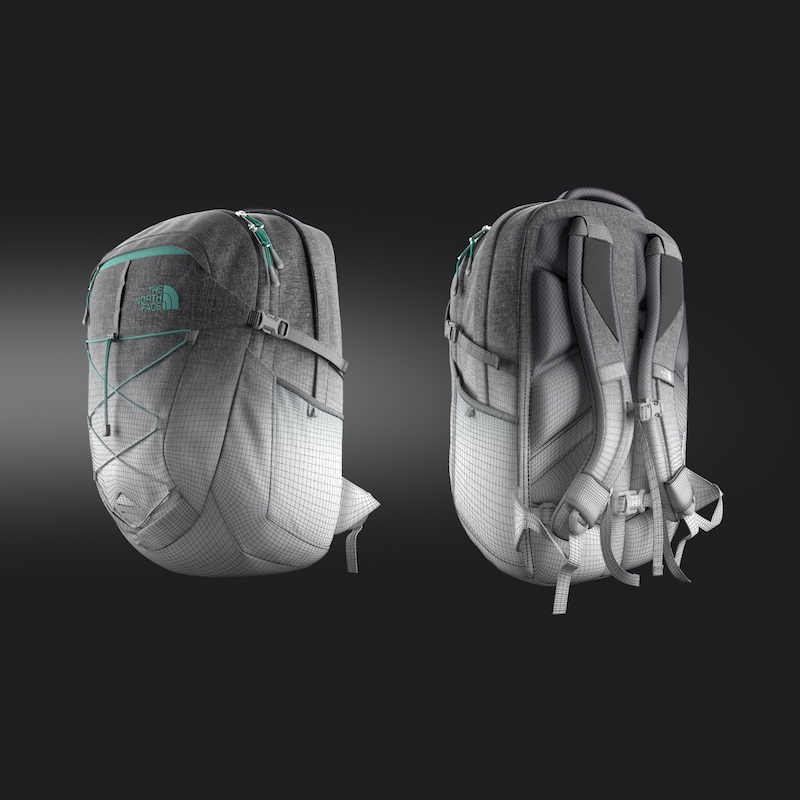
2. Modeling & UV Mapping
The base structure Model sometimes referred to as a Wireframe, is created for all assets needed to compose the scene. Each Model is then “unwrapped” in the same way you might break down a cardboard box in order to make it lay flat. This unwrapping or UV Mapping allows the artist to evenly apply surface textures and detailing to the Model in the next step.
3. Texturing & Shading
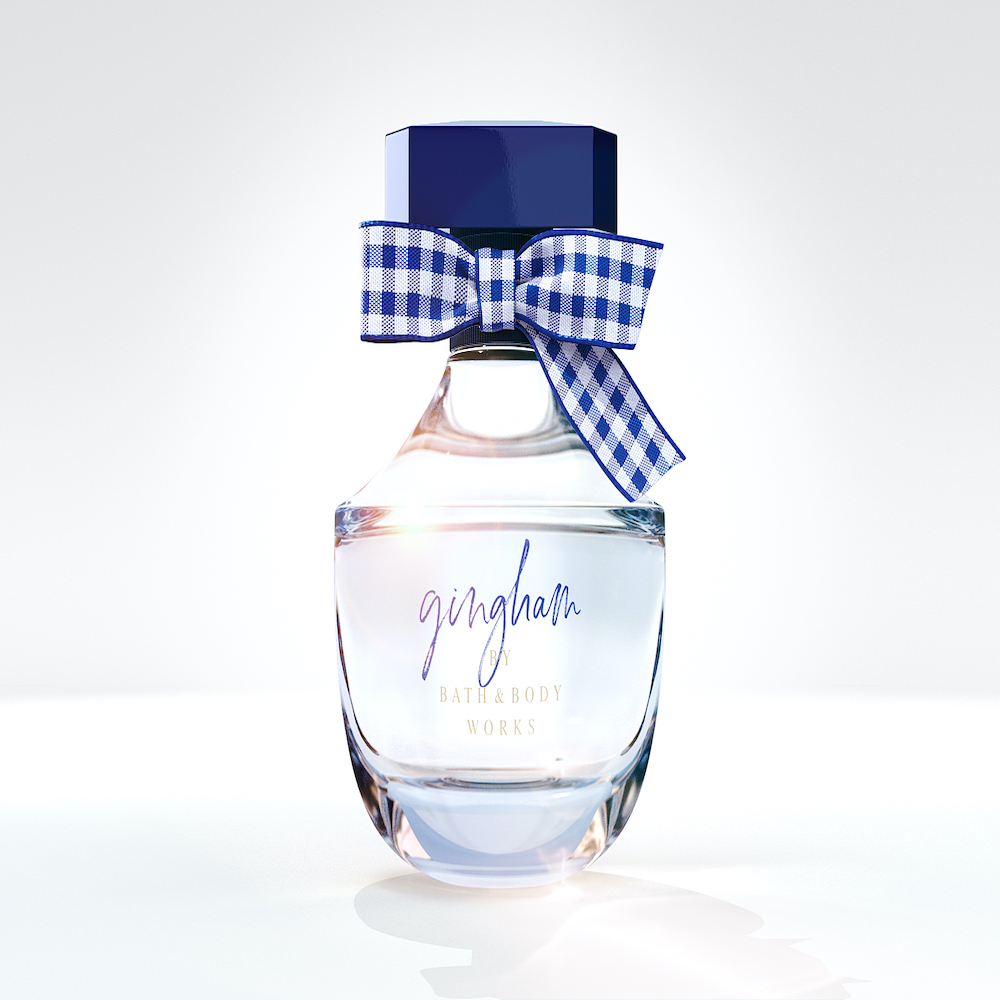
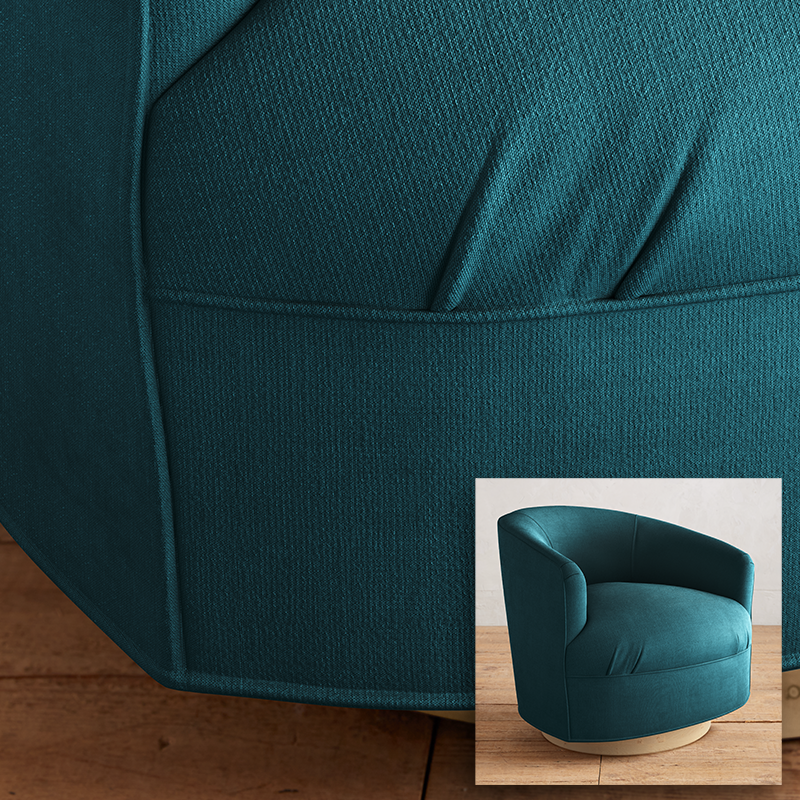
With all Models properly UV Mapped, the artist can now focus on assigning material properties to each asset that best represent the Supplied References from Step 1. For a perfume bottle, this might mean crystalline glass with shiny gold trim. For a brick facade, the application of a rough surface texture with very little reflection would be necessary.
4. Lighting
With all of the assets’ material properties in place, the artist begins placing lights around their 3D scene, not unlike how a photographer moves lights within their studio space; tweaking things here and there to create key lights, shadows, and fill. If added nuance is desired, or the lighting of a real-world environment needs to be replicated, High Dynamic Range (HDR) photographs can be used to project light onto the scene, just like the domed theater of a planetarium. Thanks to the Texturing & Shading process, the assets reach their full potential at this step and the whole scene comes together.
5. Rendering
The computer’s processing power takes over at this stage and breaks down the scene, pixel by pixel, as a camera’s image sensor processes light or the nozzle of a printer mixes microscopic points of ink. The result is awe-inspiring imagery that you’d be hard-pressed to believe is not a photograph.
6.Practical Applications
CGI is an extremely impactful workflow for any project where traditional photography or video falls short, either logistically, financially, or most often creatively. With CG you can start producing marketing imagery for a new product that hasn’t been manufactured yet, eliminate the need for studio shoots filled with crews, or push your creative boundaries to quickly experiment with lighting, camera angles, and environments that just wouldn’t be practical by traditional means.
If you’re in search of a full-service CGI post house to bring your imagery to life in 3D, you have come to the right place. Learn more and schedule a visit today.